
Complete guide to recording your first automated webinar

Introduction
Webinar presentations can be created using Microsoft PowerPoint, Google Slides, or advanced virtual presentation software such as Prezi.
In this article, we will focus on recording an existing presentation with free software called OBS studio.
There are several other recording applications such as Camtasia and FlashBack. But OBS Studio is free to use and a great fit for recording webinars.
Installing OBS Studio
OBS Studio supports all major operating systems: Mac, Windows, and Linux.
In this tutorial, we will focus on Windows, but the steps will be similar for all platforms.
Start by downloading the installation file for your operating system from this website: https://obsproject.com/download
Install the program. There is no need to change default settings during installation. After installation, you can run the application. It will open a window which should look like this.

If the configuration wizard is displayed, choose the Optimize just for recording, I will be not streaming option. Click on Next. In the second window, select your resolution.

The resolution might vary depending on your monitor. In our case, it is 1920x1080. Under FPS, select 30.
The last configuration screen is only a summary. Use the Apply Settings button.

Basic components
There are four main components that you will use when recording a webinar presentation:
- Scenes
- Sources
- Audio Mixer
- Controls

Scenes
The scene is a canvas where your screen sharing video or your webcam video will be displayed. There should already be one scene pre-defined. There is no need to add another one. You can have multiple scenes for multiple sources, but for a simple presentation, one scene is enough.
If you try to remove the last scene, you will see a warning message that at least one scene must be present.

Sources
To add a source, click on the plus icon under the Sources section.
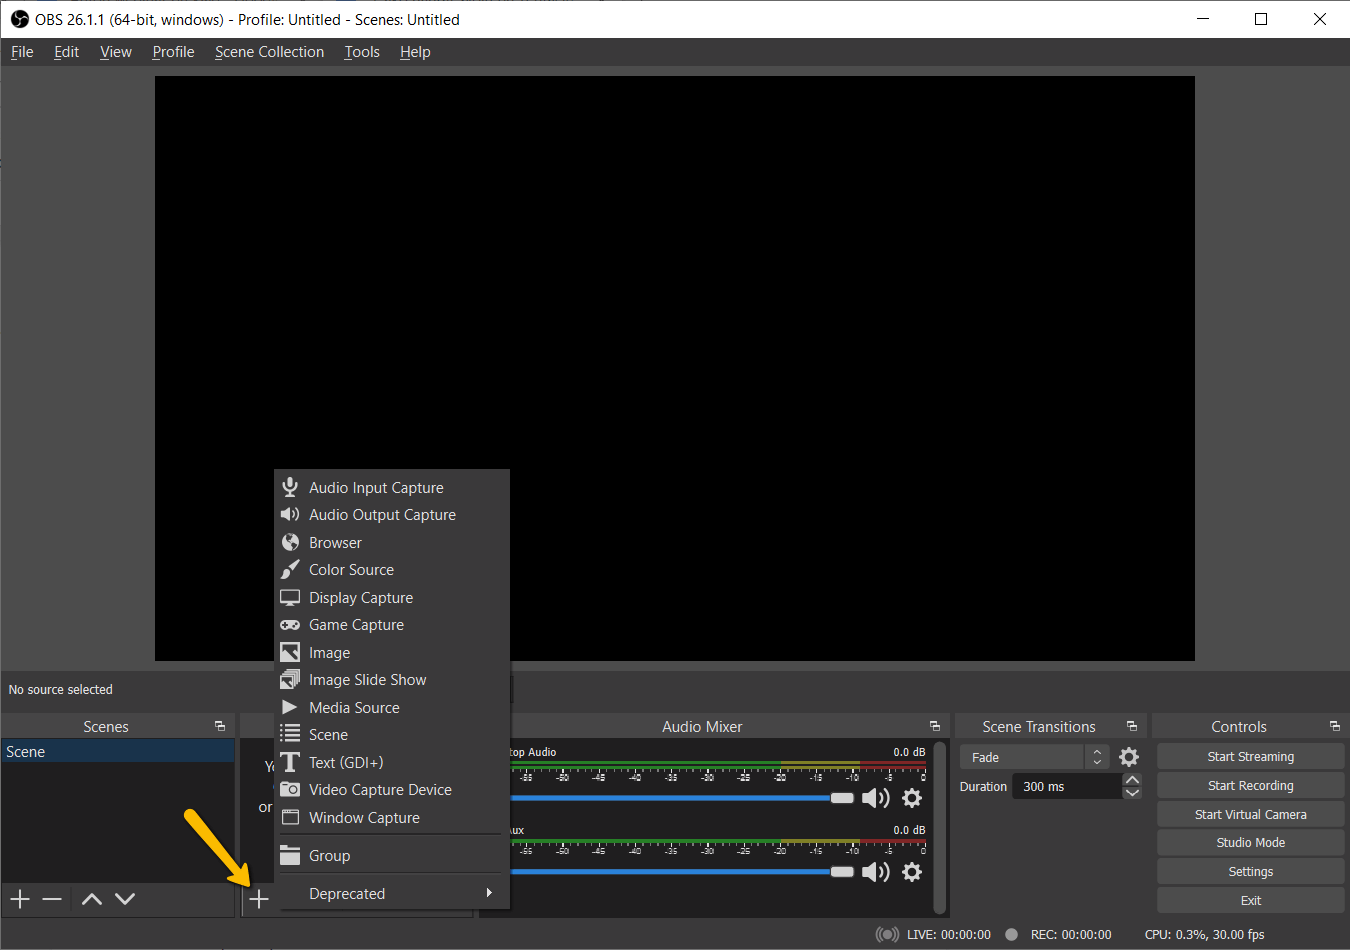
There are multiple options, but we are interested only in the following:
Audio Input Capture
It captures audio from your physical microphone. It can be a standalone mic or one integrated into your headphones or webcam.
Audio Output Capture
It is usually used if you want to play a (YouTube) video from your computer, and you would like to include audio from it in your presentation. We will not use it in this tutorial to keep it simple, but we wanted to mention it in case you would like to use it.
Display Capture
Display capture records your whole display. It captures everything you see on your screen.
Window Capture
Window capture captures only the selected (program) window. You will use this option if you want to share only one window with your attendees (e.g. PowerPoint presentation). If you want to share multiple windows, we recommend using the Display Capture and sharing your whole screen.
Video Capture Device
It is used to capture your webcam if you want to record your face in a presentation. It can bring value by building trust with your audience. If you are not scared to show your face, we recommend using it.
At least Audio Input Capture and Display Capture is needed for a simple presentation.
Recording your voice
To record your voice, select the Audio Input Capture option.

Leave the Create new option selected. Input your microphone name (e.g. Headset Microphone).

Press OK. On the next screen, a list of all connected microphones and devices with a built-in microphone is displayed. Select the microphone you want to use.

After confirmation, you will see a new source added in the Sources with the provided name.

As you can see the default Desktop Audio (needed if you want to record PC sounds e.g. video played by your PC) and default Mic/Aux are muted. Only my newly added microphone is unmuted.
Now we are ready to start recording even if we have no video sources added yet. Be careful, there are two buttons:
- Start Streaming
- Start Recording
Of course, we want to use Start Recording.
Click on it and try to record some voice. The indicator in Audio Mixer should display activity if you set it up correctly. Confirm with Yes to record without video for now.
When you are done, click on the Stop Recording button displayed in the very same place as the Start Recording button was.

You can find the recording output path under File -> Settings -> Output -> Recording path. While you are there, change the .mkv output format to .mp4, which is widely supported in many video hosting applications.

Copy this address and paste it into your file browser.
You can see my very first recording in my folder.

You can try to play your file with your favorite video player. For example, use a VLC player. You will not see any video yet, because we haven’t set it yet, but the audio should be recorded. We are ready to set up the video in the next steps.
Display Capture & Window Capture
Display Capture
The easiest way to record a video is to use Display Capture. You may experience an issue where no video is picked up. It is caused by having multiple video cards inside your PC or laptop.
To solve this issue, follow this tutorial: https://www.youtube.com/watch?v=FrmcLHFCAiM
Window Capture
As we mentioned earlier, Window Capture will capture only one window. If you want to switch between multiple windows/screens, a better way would be to use Display Capture. Usually, we use only a simple presentation in webinars so for our purpose it is enough to use Window Capture.
- Open your webinar presentation slides - we will use Google Slides in the Google Chrome browser.
- Start the presentation with a Present button.

- Now, when the presentation is running, use Alt/Tab to switch to OBS Studio.
- Press the Plus icon and select the Window Capture option.
- Input a name you like, e.g. Presentation and click the Ok button.
- On the next screen, you can choose your window with Google Slides. Confirm by clicking the Ok button.

- After this step, you will have 2 Sources: Audio & Video. Now, you can start the recording.
- Tip for you: Go to File -> Settings -> Hotkeys and set some key to start recording and also to stop recording. With this, you can start/stop the recording with a keypress.

- Now, try to record your presentation!


Video Capture Device
As we mentioned earlier, you can record your webcam as well. When using slides, people tend to record their face and display it as a small window in a corner of a screen.
To record your webcam, add a new Video Capture Device.

As usual, type in a name and confirm by pressing the OK button.

On the next screen, make sure your webcam is selected under the device dropdown. Proceed by pressing OK.

Resize and move the added window to any place you like. For example, to the bottom right corner.

Please make sure that your presentation has no text in the corner you place the webcam recording as it will cover the text.
Summary
We learned how to record a screen and microphone with OBS studio. We also learned how to add a web camera stream to make the webinar more friendly.
Now is the perfect time to put the knowledge into practice and record your first automated webinar and upload it to an automated webinar platform. Since you are there, why do not you check our complete blueprint of a high converting webinar?